Philips BX495U
...they said it couldn't be restored
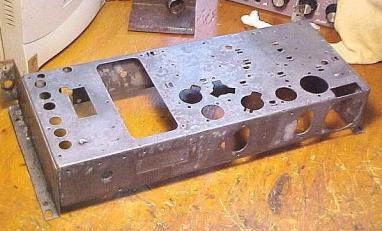
Ok, we left off with this bare chassis. Something that is somewhat unique about European radios is the three-dimensional wiring. In the US sets tend to have everything going from point A to point B in a plane parallel to the chassis. Eurosets often use vertical component stacking which is a real bummer when you want to replace 'lower level' components.
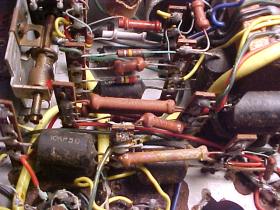
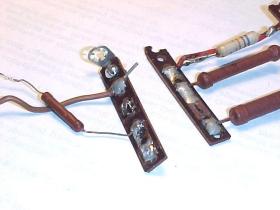
This set was no exception. The majority of the components were mounted on thirteen vertically mounted terminal strips. Each 'pair' of strips was like a little sub-assembly so it was actually easy to refurb. Problem was that the ends of the terminal strips were staked (pinched) into the chassis and the only way to remove them was to break them off. I rebuilt each strip and added a solder lug at the bottom to remount them.
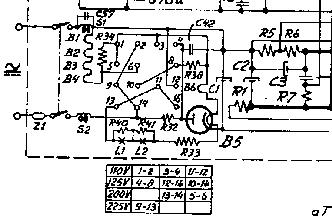
Reassembly of the set was pretty routine. Not having the schematic at the time, I ran into a couple of weirdo components that had me baffled as to what they were. Walter's schematic came thru in the end
Needless to say, all the caps that the rats had been eating away at were replaced, and the majority of resistors were also replaced.
The set had to have all new tubes. I literally had to break a couple out of their sockets because they were rusted in place. The corrosion seems to have eaten away thru the pins where they entered the glass envelope allowing the vacuum to be lost. The strange one is the UCH21 front end tube. Its cloudy inside as if it were gassy but it works. Neither of the two NOS replacements from AES would work. I don't know what to blame that on...my tester will not handle these tubes.
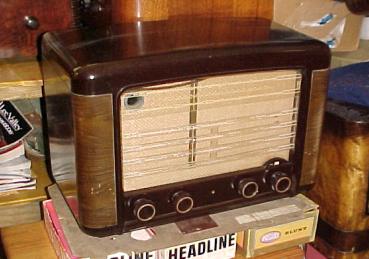
Here's the finished set. Oops, shoulda tucked that dial gasket at the top into place before the photo. After everything else I guess I didn't even notice that detail until after taking the photo. The radio aligned fairly well and plays great on all 6 bands and is a super performer.
So...whats left to be done? The whole series filament string has been a major challenge. I had hoped to use a 1629 eye tube because of the cost and the dial lights are in limbo for not having figured this out. Remember I removed the rectifier tube and all the multi-voltage switching mess so now its in a state where I must decide which way to go. If you think I'm just a dummy who can't figure out a series string filament set, take a gander at this.
I've never seen a Philips of this model before but ironically TWO showed up on ebay.de while I was working on this project. One got $80 or so, the other got $120 or so. Both were nice original sets but that was a nice encouragement that I was not wasting my time fixing up an old useless set. Many of these nice old Philips rigs simply don't sell well because they are either too common or such a nightmare for restoration.
The moral of the story here is that often even the worst of junkers can be restored into being a worthwhile set. My example of this model will never be of the original state that collectors desire, but it was a very rewarding exercise for me to make a keeper out of what others may have simply tossed into the trash barrel. They gotta be worse than this for me to throw them out!
Hope you enjoyed this restoration description. Any questions contact me at exray at coqui.net. -BM 07/2002
Return to The Sparkbench Main Page